How to Download and Install macOS Using Claude AI. Installing or reinstalling macOS on your Mac is a fairly straightforward process, but it does require some preparation and knowledge to do it properly. In this comprehensive guide, I’ll walk you through everything you need to know to download and install the latest version of macOS using Claude AI to assist you.
Whether you’re installing macOS for the first time on a new Mac, upgrading to a newer version of macOS, or reinstalling your current version of macOS to fix problems, this guide has you covered. I’ll provide step-by-step instructions, tips for avoiding issues, and troubleshooting advice in case anything goes wrong. We’ll also discuss the differences between installing macOS from the App Store, using a bootable installer drive, and more.
By the end of this guide, you’ll have a fresh installation of the latest macOS version up and running on your Mac with Claude AI’s help. Let’s get started!
Overview of Installing macOS
Here’s a quick overview of what’s involved in installing macOS:
- Get the macOS installer – You’ll need to download the macOS installer from the App Store or create a bootable USB installer drive. We’ll cover both methods later.
- Make a backup – Before installing macOS, it’s crucial to back up your data in case anything gets overwritten or lost in the process.
- Start up from the installer – Boot your Mac from the installation media instead of the normal startup disk to begin the installation process.
- Walk through the setup assistant – The macOS installer will guide you through a series of steps to configure your language, location, accounts, security settings, and more.
- Transfer information from a backup – After installation, you can transfer user data, files, and settings from a Time Machine or other backup.
- Reinstall apps and settings – Finally, you’ll want to reinstall any apps you need and configure system preferences to get your Mac working just the way you want.
It may sound complicated, but I’ll provide step-by-step guidance throughout this article to make the process as smooth as possible. Let’s start by going over how to get the macOS installer.
Downloading the macOS Installer from the App Store
The easiest way to get the macOS installer is directly from the App Store on your Mac. Here’s how:
- Open the App Store app on your Mac. Make sure you’ve already signed in with your Apple ID.
- Click on the Search tab and type “macOS” (without quotes). The latest macOS version should appear.
- Click “Get” and then “Download”. This will download the installer which you can then use to upgrade or reinstall macOS.
- Once the download is complete, the installer app will be located in your Applications folder.
The benefit of using the App Store installer is that it’s very convenient and ensures you get the latest version of macOS from Apple. The only requirement is having an internet connection to download the large installer file.
Next, I’ll go over how to create a bootable installer drive which works better for more complex installations.
Creating a Bootable macOS Installer Drive
A bootable installer drive allows you to install macOS on Macs that otherwise can’t access the internet to download the installer. It also provides more flexibility and options during installation.
Follow these steps to make a bootable USB drive for installing the latest macOS:
- Get a USB thumb drive – You’ll need a USB stick that’s at least 12GB in capacity. The drive will be erased, so make sure there’s no important data on it.
- Download the macOS installer – If you don’t already have the installer, download it from the App Store using the steps in the previous section. Quit the installer app once the download finishes.
- Connect and format the USB drive -Plug your USB drive into your Mac. Launch Disk Utility and select your drive from the sidebar. Click “Erase” and format it as “Mac OS Extended (Journaled)”. Give it a name like “macOS Installer”.
- Create the bootable installer – Now launch Terminal which you’ll find in the Utilities folder or via Spotlight search. Enter this exact command in Terminal, replacing “InstallerName” with the name of your installer (for example, “macOS Ventura”) and “MyVolumeName” with the name you gave your USB drive:
sudo /Applications/Install macOS.app/Contents/Resources/createinstallmedia --volume /Volumes/MyVolumeName -- /Applications/Install macOS.app - Wait for the process to complete – This will take a while as all the installer files get copied over. The USB drive will be renamed once completed.
You now have a bootable macOS installer drive you can use for clean installations, downgrades, troubleshooting, and more!
Backing Up Your Data Before Installing macOS
Before installing, upgrading or reinstalling macOS, it’s highly recommended to back up your important files, folders and system settings in case anything gets erased or damaged in the process. Here are your backup options:
- Time Machine – Time Machine is the built-in backup solution in macOS. It requires an external storage drive connected to your Mac. Enable Time Machine in System Preferences and it will regularly back up all your data.
- Cloud backup – Services like iCloud, Dropbox or Google Drive let you backup your files to the cloud. Be sure you have enough cloud storage to fit all your data.
- Clone your hard drive – Apps like SuperDuper! and Carbon Copy Cloner make an exact duplicate bootable copy of your current hard drive. This lets you restore your full system if needed.
- Manual backup – You can always manually copy important files and folders to an external hard drive or another Mac.
I suggest using Time Machine plus at least one other backup method for redundancy. Test restoring some files from the backups to verify they were created properly. With your irreplaceable data protected, you can proceed with your macOS installation knowing your data is safe.
Preparing to Install macOS
Now that you have the macOS installer and backups ready, here are a few things to check before starting installation:
- Ensure your Mac has a wired internet connection for fastest downloading of files.
- Plug your Mac into AC power to maintain continuous power.
- Close all open apps and windows so the installer has full access.
- Disable anti-virus software which may interfere with installation.
- Confirm you have full admin rights on your user account and there are no firmware passwords set.
- Read the latest Apple release notes for known installation issues.
- Connect and test any external drives you plan to use for backup.
- Ensure your USB installer drive is connected if you’re not installing from the App Store.
Taking these preparatory steps will smooth the installation process and minimize the chance of errors. Once you’re ready, it’s go time!
How to Start Up and Install macOS
With the preparations complete, here’s exactly how to start up your Mac from the installer and walk through installing macOS:
- Restart your Mac – Choose Restart from the Apple menu. As it reboots, hold down the Option key until you see the Startup Manager.
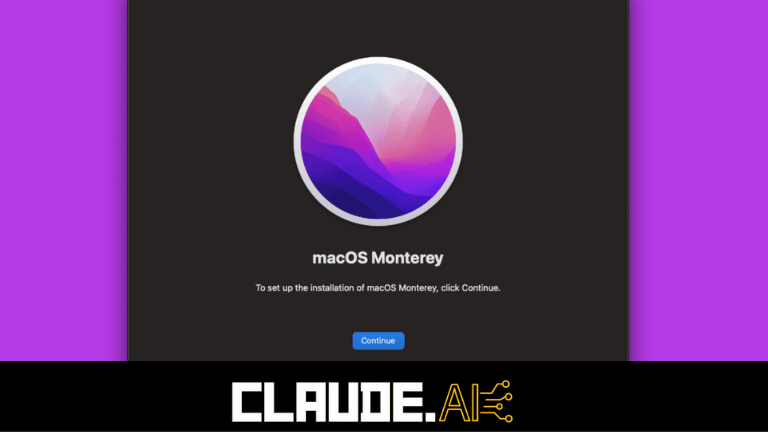
- Select your install media – Pick the macOS installer volume to boot from. You’ll see the macOS Utilities window.
- Launch the installer – Click on Install macOS (or Upgrade on older versions). The installer will launch.
- Agree to the license agreement – Review the license terms and agree to them. Click Agree to proceed.
- Select the destination drive – Choose the volume or partition you want to install macOS on. Typically this will be your main internal drive.
- Allow installation to complete – The installer will now do its thing. Let the process run – this can take a while. Your Mac will reboot a few times.
- Configure macOS basics – You’ll walk through the macOS setup assistant. Set up your preferences, accounts, security settings and more.
- Restore data from backup – Once you reach the desktop, you can transfer data from a Time Machine or other backup if desired.
That’s essentially it for installing the macOS system itself. Next I’ll explain how to reinstall apps and further refine your settings.
Reinstalling Apps and Configuring Settings after Install
With a fresh macOS installation complete, some further steps will make your Mac working just right:
- Reinstall third party apps – Download and install apps like web browsers, productivity suites, communications tools, etc from their official providers.
- Set up iCloud and sync data – Sign into iCloud to sync contacts, calendars, reminders, Keychain passwords and other data.
- Customize System Preferences – Tweak your desktop, display, keyboard, mouse, network and other system settings.
- Copy back personal files – Restore your own documents, media, custom settings.
FAQs
1. What is the latest version of macOS?
The latest version of macOS is Ventura. Apple releases a new version of macOS each year.
2. How can I get the macOS installer?
You can download the installer from the App Store on your Mac. Or create a bootable USB installer drive.
3. Do I need to backup my Mac before installing macOS?
Yes, always backup your data beforehand using Time Machine, cloud storage, or a cloning app.
4. What methods can I use to backup my Mac?
Top backup options are Time Machine, cloud services like iCloud, cloning apps like Carbon Copy Cloner, and manual file copies.
5. How do I create a bootable macOS installer drive?
You’ll need a 12GB or larger USB drive. Format it, download the installer, then use the createinstallmedia command in Terminal to make the drive bootable.
6. Can I upgrade to macOS directly from an older version?
Usually yes, as long as your Mac supports the latest macOS version. But clean installs are recommended for best performance.
7. What steps do I take to install macOS?
Restart into the installer, select your target drive, accept the licensing agreement, then let the process run until completion.
8. How long does it take to install macOS?
Installation time varies based on your Mac’s specs but expect anywhere from 20 minutes to over an hour in most cases.
9. What will I need to do after installing macOS?
You’ll want to reinstall apps, restore data from backups, customize System Preferences, and copy back personal files.
10. Can I install macOS on an external drive or partition?
Yes, the macOS installer lets you select any drive or partition to install to, including external drives.
11. Does macOS automatically update after installation?
Minor updates will be downloaded but you’ll still need to manually install major new macOS versions annually.
12. What happens to my data and apps when installing macOS?
A clean install will wipe the target drive so be sure to backup first. An upgrade install preserves most data.
13. Will my Mac work if I revert to an older macOS?
In most cases yes, but very old versions may not have drivers for newer Mac hardware.
14. Is it better to do a clean install or upgrade?
Clean installs give the most stable results, while upgrades are quicker and preserve your data.
15. How can I troubleshoot installation problems?
Consult Apple’s support docs, use Installer Logs, try safe mode, verify disk permissions, or contact Apple support.
